Table of Contents
Lightroom can make use of both the MIDI and keycode integration. Use the MIDI integration for deeper control of Lightroom features such as adjusting individual sliders or resetting specific values.
MIDI is the recommended integration method for Lightroom.
MIDI2LR Companion App
Native MIDI control of Lightroom relies on the MIDI2LR control surface plugin. Note that MIDI2LR Version 3 supports Lightroom 6+ or Lightroom CC Classic. Version 4 requires Lightroom 10 Classic. Version 5 requires Lightroom 11 Classic.
Other similar MIDI control surface plugins for Lightroom may also be compatible like Peltmade LrControl, but only MIDI2LR is recommended.
Download Official MIDI2LR Release
Download MIDI2LR (GitHub)Installing MIDI2LR
- Download the
.dmgfile for MacOS or the.exefor Windows. - Quit Lightroom Classic if open.
- Double click the installer you downloaded in Step 1 and follow the prompts onscreen to install.
View detailed MIDI2LR Installation Instructions on GitHub
Using MIDI2LR
MIDI2LR Will open its companion app every time you open Lightroom Classic. The companion application allows you to assign functions to various MIDI channels on Conductor. You can define the Lightroom function for every MIDI control set in here.
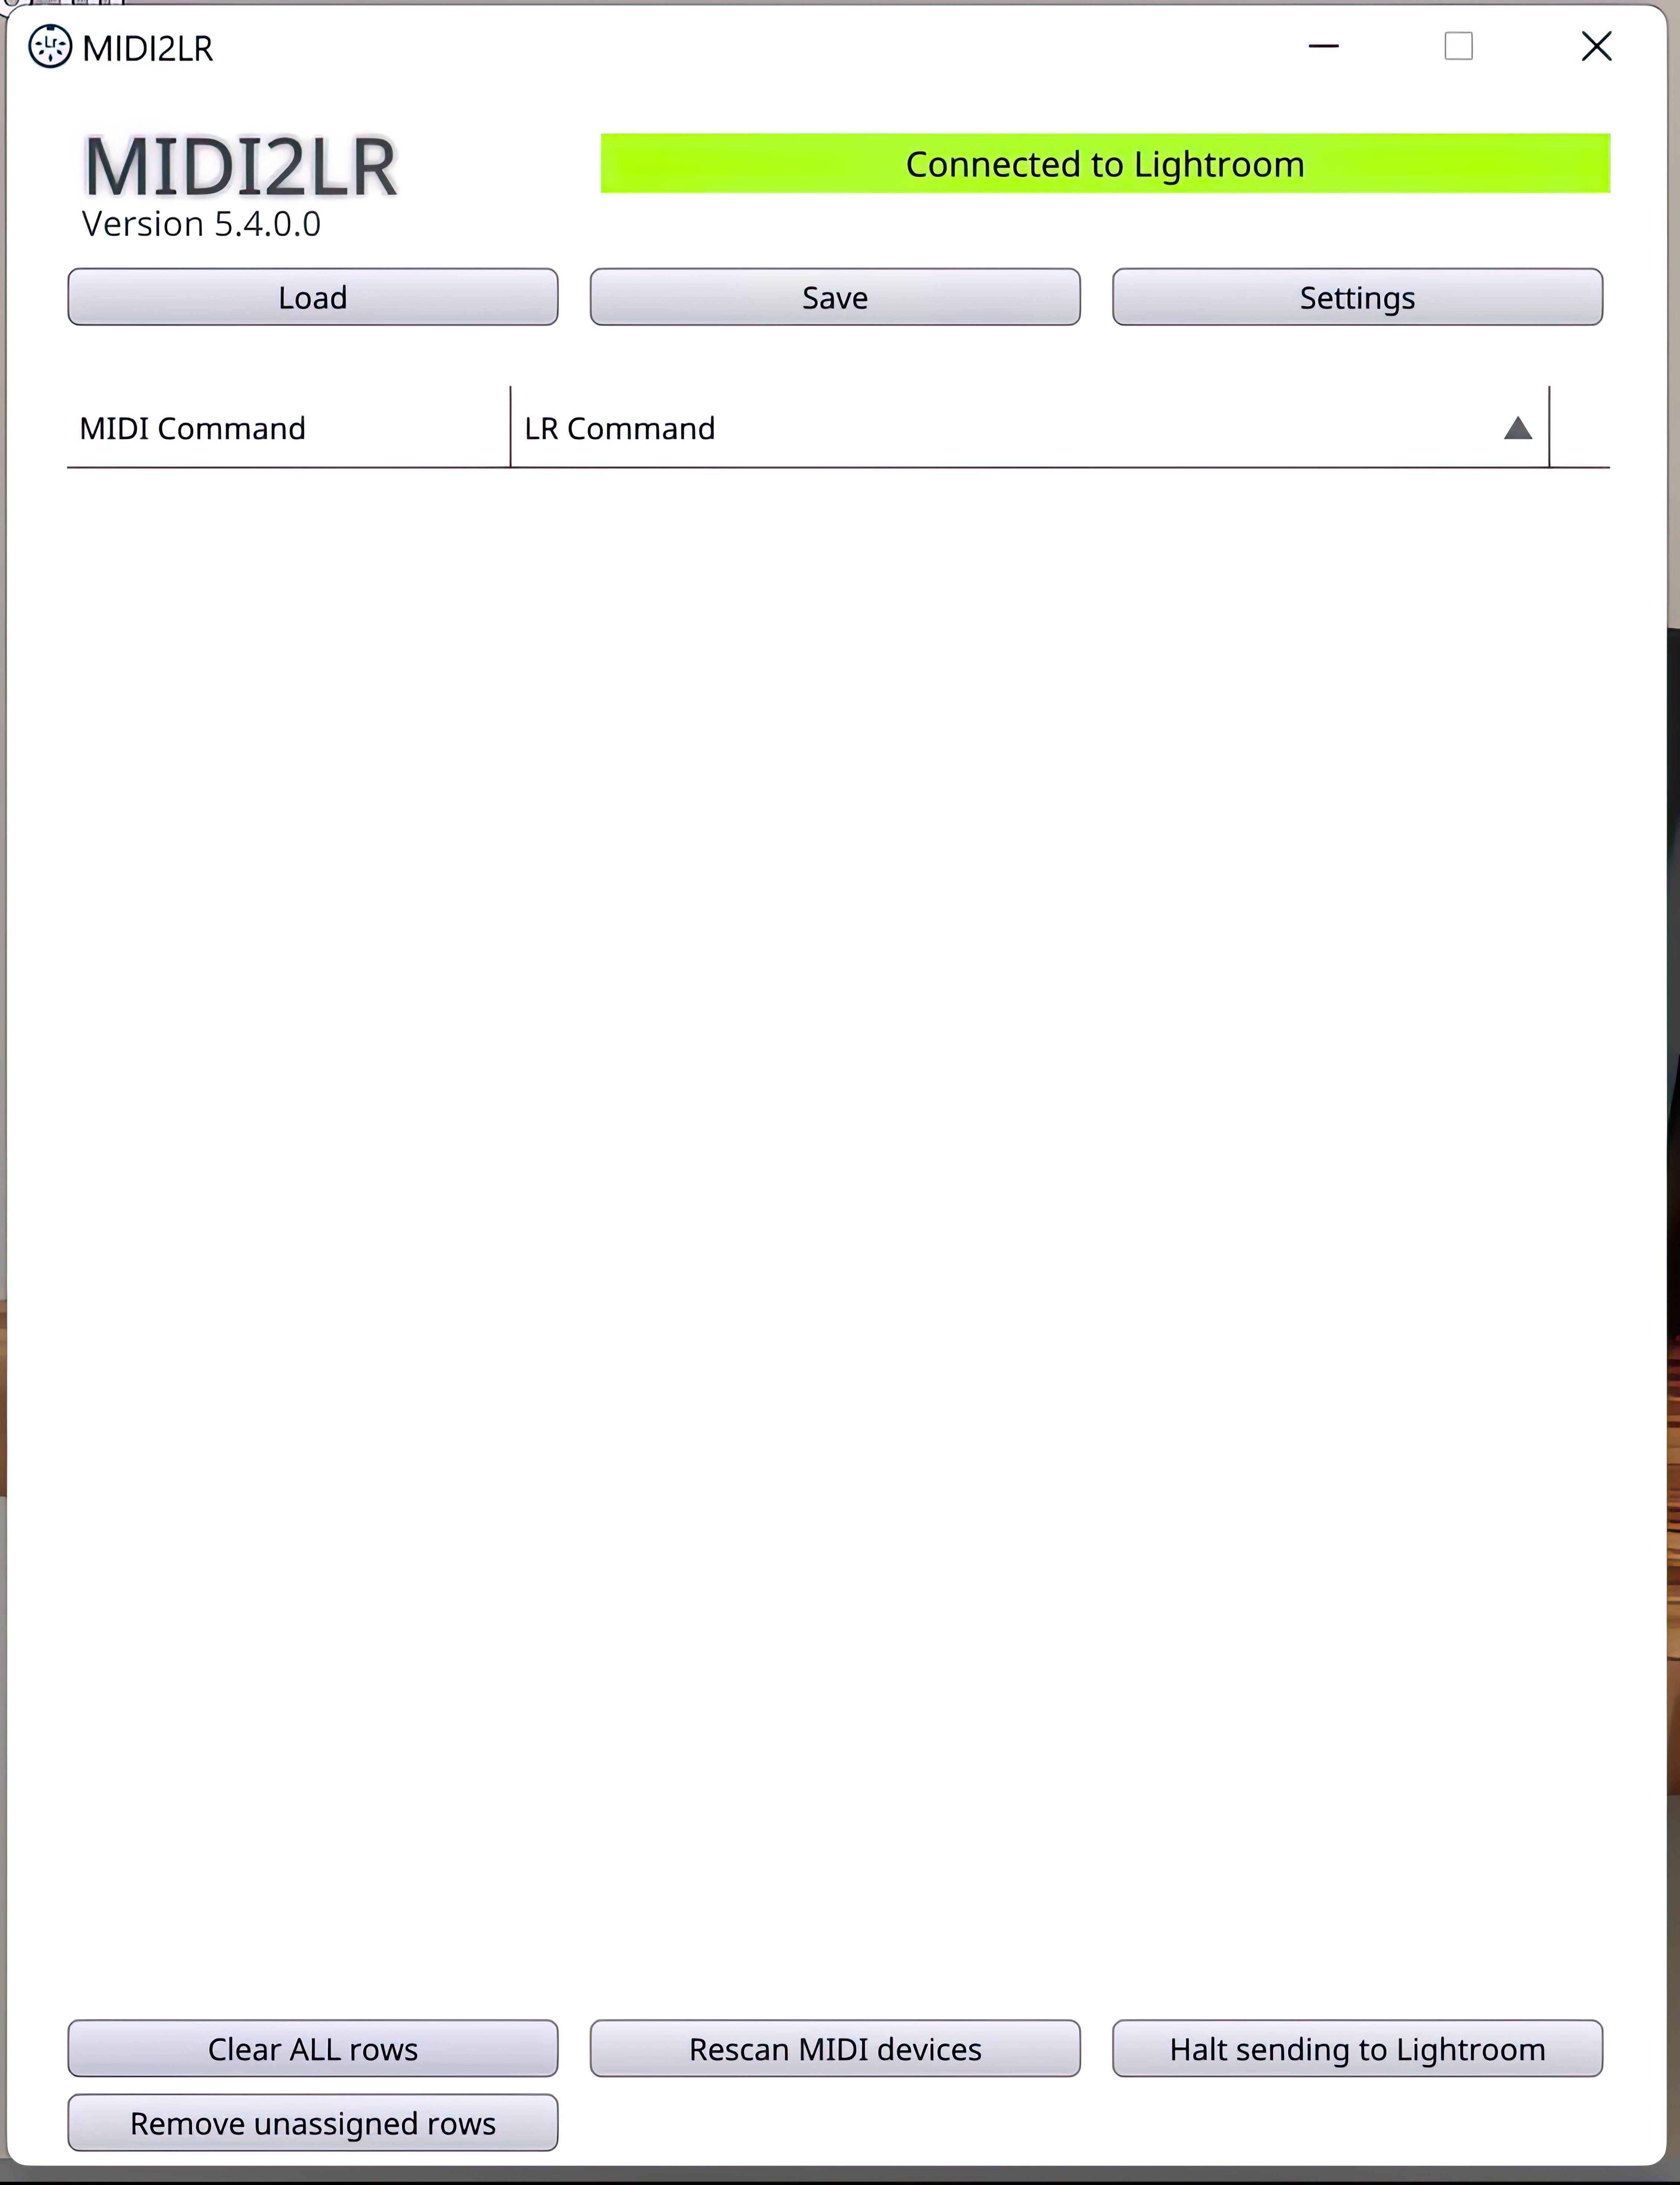
Ensure that your Conductor is connected to your computer already. If it is not, connect your Conductor and press the “Rescan MIDI Devices button” on the bottom of the app.
Assigning Functions
To begin assigning MIDI controls to Lightroom, press the button or rotate the encoder assigned to the MIDI control. You will see a row appear corresponding to CC Message. If it does not appear, ensure your Conductor is connected and click “Rescan MIDI Devices.” If it still does not appear, restart Lightroom while leaving Conductor connected.
You must setup the CC Message Type before continuing if you are setting up rotation. If you are setting up a press, this next section can be skipped.
Right-click on the dropdown in the LR Command Column. You will be see the “Adjust CC Dialog” message box appear.
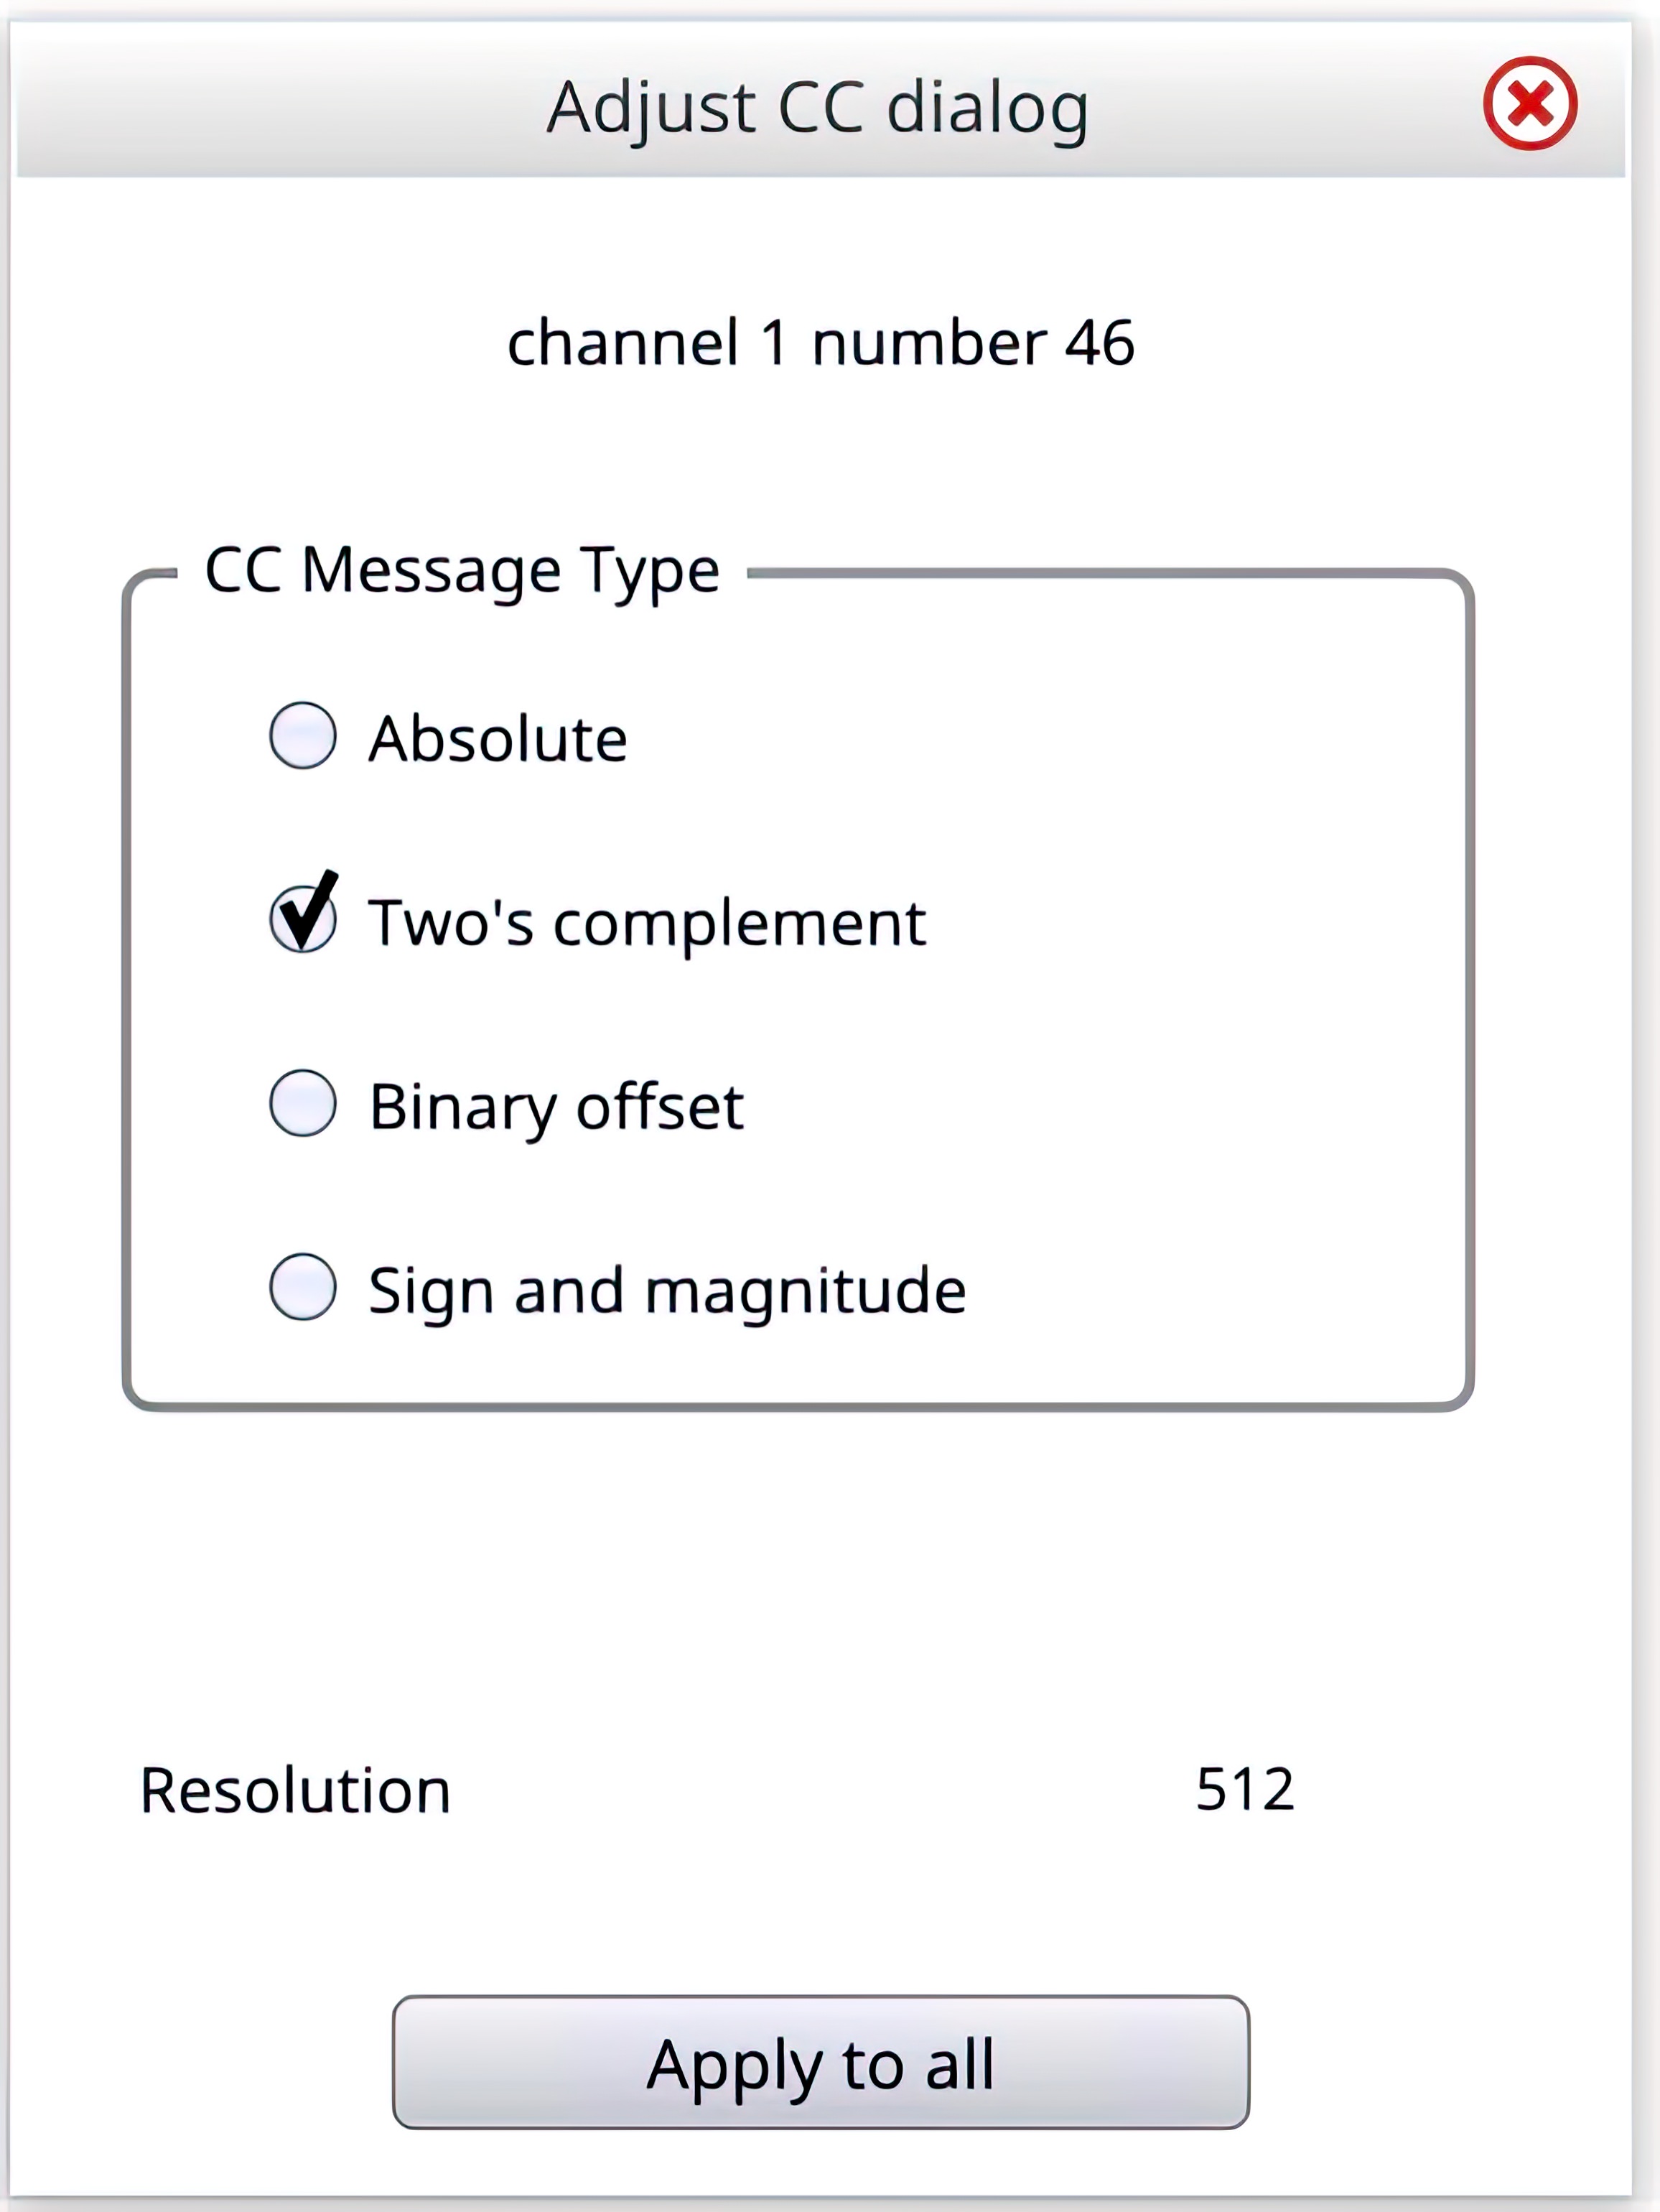
Conductor sends “Two’s complement” messages so ensure that type is selected under CC Message Type. You can adjust the “Resolution” of the encoder for this specific CC Message. A higher resolution will allow more fine grained control (more rotations per change) while a lower resolution moves in larger steps. Every setting may call for a different resolution and allows you to fine-tune your experience.
Failing to set the CC Message Type for encoders will cause Lightroom to behave unexpectedly. Ensure you set this for each encoder you are specifying. This setting is not necessary for pressing.
You can now pick a Lightroom function to associate with the rotation or press through the “LR Command” dropdown. There are an extreme number of available commands, but the most commonly used ones exist under Basic Tone and Detail. You can see the full list of commands on the MIDI2LR GitHub Wiki.
Keycodes
Lightroom supports many keyboard shortcuts that can be assigned to Conductor. All keyboard shortcuts can be assigned to any of Conductor’s knobs or presses. Learn more about assigning keycodes to understand how to continue advanced keycodes and macros.
Common Keyboard Shortcuts
Some of the most common keyboard shortcuts are:
| Shortcut | Function |
|---|---|
G |
Enter Library Grid View |
D |
Enter Develop Mode |
Shft + Tab |
Hide All Panels |
Alt + Click |
Toggle Solo Mode |
Ctrl + Alt + V |
Paste Settings from Previous |
\ |
Before/After |
P |
Flag Photo as Pick |
[/] |
Decrease/Increase Brush Size |
Ctrl + [/] |
Rotate Photo Left/Right |
Down/Up |
Decrease/Increase Current Slider |
Shift + Down/Up |
Decrease/Increase Current Slider Faster |
, (comma) |
Select Previous Slider |
. (period) |
Select Next Slider |
You can see the full list of keyboard shortcuts available for Lightroom on the Adobe website.